

What if the real problem is not your entry signal, but the currency pair underneath it? A strategy can look tidy on one pair and fall apart on another because the market itself behaves differently.
That difference starts with liquidity.
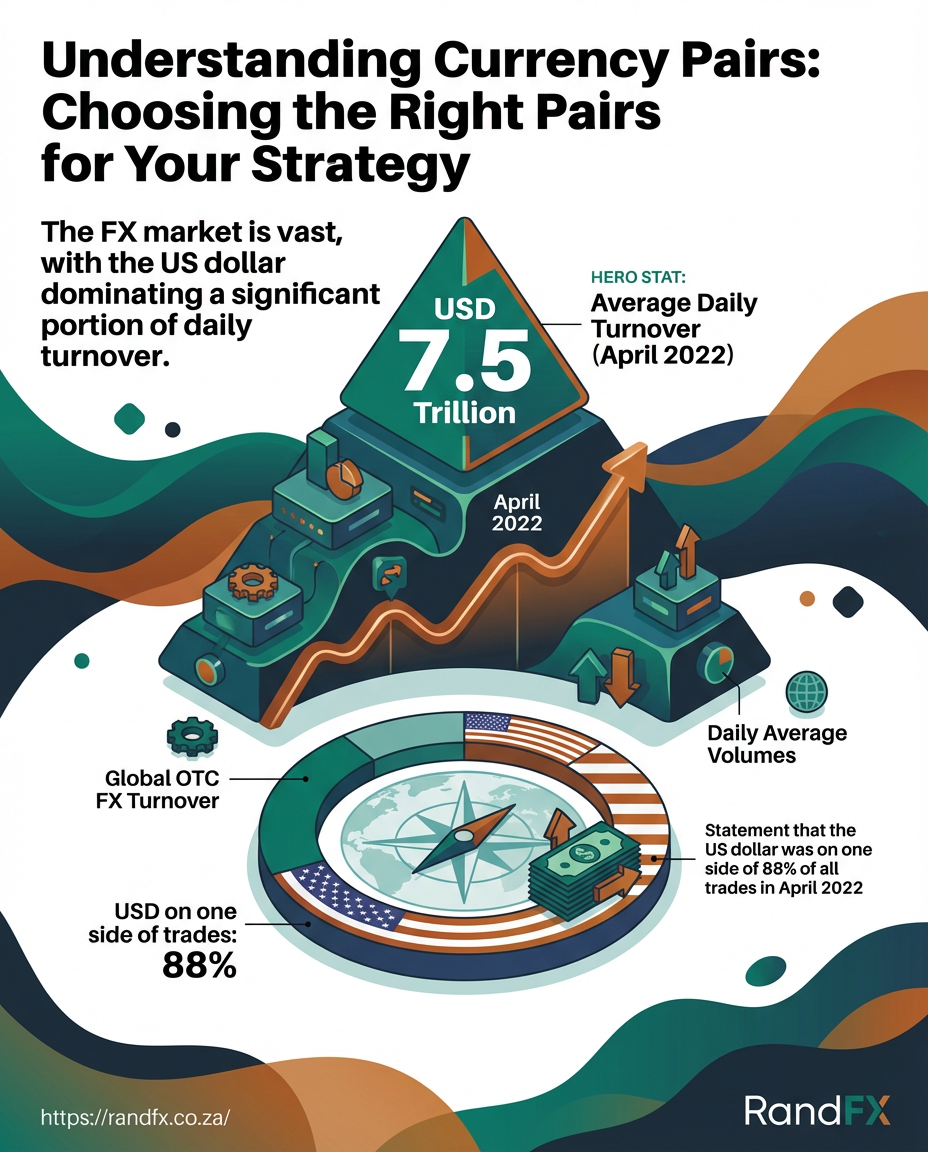
The global FX market averaged $7.5 trillion a day in April 2022, and the US dollar appeared on one side of 88% of trades in that same survey, which is why major pairs usually trade with tighter spreads and smoother fills than thinner crosses.
A pair is never just a price chart.
It also carries volatility, transaction costs, and the economic drivers that move it, from interest-rate gaps to risk sentiment.
That is why pair choice shapes strategy design so strongly.
A momentum setup, a mean-reversion idea, and a carry-style approach can all look sensible on paper, yet only one may match the pair’s natural rhythm and cost profile.
Basics of Currency Pairs and How They Work
A currency pair always has two jobs at once.
The first currency is the base, and the second is the quote.
So EUR/USD means you are pricing one euro in U.S. dollars, while USD/JPY means one U.S. dollar in Japanese yen.
That tiny difference changes how the chart behaves and how the trade is priced.
A pip is usually the smallest standard move traders care about, but its dollar value changes by pair, contract size, and the quote currency.
In a large market like FX, that matters more than beginners expect; the BIS reported $7.5 trillion in average daily FX turnover in April 2022, with the U.S. dollar on one side of 88% of trades.
Pip basics: A move from 1.1000 to 1.1001 in most non-JPY pairs is one pip.
In JPY pairs, a pip is often 0.01, so 150.20 to 150.21 is one pip.
Why pip value shifts: A pip in EUR/USD is not the same cash value as a pip in USD/JPY, because the quote currency differs.
That is why position size, stop distance, and account currency all matter before you press buy or sell.
Pair classifications at a glance
| Pair class | Examples | Typical liquidity | Typical spread (relative) | Best for |
|---|---|---|---|---|
| Majors | EUR/USD, USD/JPY, GBP/USD, USD/CHF | Deepest | Tightest | Beginners, scalpers, systematic strategies |
| Minors / Crosses | EUR/GBP, AUD/JPY, EUR/JPY | Good to moderate | Wider than majors | Swing traders, macro traders |
| Exotics | USD/TRY, USD/ZAR, EUR/TRY | Thin | Widest | Experienced traders who can handle jumps |
| Emerging market crosses | USD/MXN, USD/PLN, USD/HUF | Uneven | Often wide | Macro trades with strong risk control |
| Commodity FX pairs | AUD/USD, NZD/USD, USD/CAD | Deep to good | Usually tight to moderate | Traders following rates, commodities, and risk sentiment |
Minors can work well when the cross rate itself carries the idea, like EUR/GBP reacting to relative policy paths.
Exotics are a different beast.
Spreads are wider, slippage can bite, and price can gap when local news lands, which is why they fit only traders who already understand execution risk.
If you want a quick rule, start with majors, then move out only when the strategy truly needs that pair’s driver.
That simple filter saves a lot of expensive mistakes.
How Pair Selection Aligns with Trading Strategies
A scalper and a position trader can stare at the same chart and want opposite things.
One cares about spread and fill quality.
The other cares about whether the pair still has room to run tomorrow.
As of the BIS April 2022 survey, global FX turnover averaged $7.5 trillion per day, and the US dollar appeared on one side of 88% of trades.
That is why major pairs usually fit fast strategies best: deep liquidity tends to mean tighter spreads and less slippage.
For execution-heavy styles, a broker comparison like compare forex brokers matters as much as the setup itself.
Pair classes by trading style
| Strategy | Preferred pair class | Priority feature | Example pairs |
|---|---|---|---|
| Scalping | Major pairs | Spread and liquidity | EUR/USD, USD/JPY, GBP/USD |
| Day trading | Major pairs and liquid crosses | Liquidity | EUR/USD, USD/JPY, AUD/USD, EUR/GBP |
| Swing trading | Liquid majors and crosses | Volatility | GBP/JPY, EUR/JPY, AUD/USD |
| Position trading | Rate-sensitive majors and crosses | Macro and carry | USD/JPY, AUD/USD, NZD/USD, EUR/CHF |
| News-based trading | Majors tied to the event currency | Volatility and execution | EUR/USD, USD/JPY, GBP/USD |
Day trading gives you a little more room, but it still punishes pairs that jump around too loosely or fill badly.
Swing and position trading can afford wider spreads if the pair has a cleaner trend or a stronger macro driver.
That trade-off is the whole game.
Scalping and day trading
The London-New York overlap is the favorite window for many scalpers because volume is usually strongest then.
Major pairs tend to move with cleaner follow-through, so price is less likely to stall after every small push.
Limit orders help keep entry costs from creeping up.
Low-latency execution matters too, because a few extra milliseconds can turn a tidy scalp into noise.
Swing and position trading
A swing trade needs a pair that can respect trend persistence without getting chopped apart by random noise.
That is why liquid crosses and majors with clear volatility regimes often work better than thin, jumpy pairs.
Position trading goes one step further.
Here, interest-rate differentials, central-bank direction, and shared currency exposure matter a lot more than a tight intraday spread.
Two pairs can look different on paper and still be the same USD trade in disguise.
Pair selection is really strategy design in plain clothes.
Pick the pair that matches your holding period, your edge, and your cost structure, and the trade usually starts making more sense.
Risk Management and Position Sizing by Pair
What if two setups have the same entry signal, but one pair can punish you twice as hard? That happens all the time.
A quiet major can behave very differently from a thin cross, especially once spread, slippage, and overnight risk enter the picture.
The cleanest way to size trades is to tie risk to volatility, not to habit.
ATR works well for that.
If your account risk is 1%, and the pair’s ATR implies a wider stop, you simply reduce size so the dollar risk stays fixed.
That matters even more in FX because liquidity is not equal across pairs.
The BIS Triennial Survey reported about $7.5 trillion in average daily FX turnover in April 2022, and the U.S. dollar appeared on one side of 88% of trades.
Majors usually handle risk better because execution is cleaner, while crosses and exotics can turn a decent idea into a messy fill.
Pair-specific risk controls
| Risk mitigation | How it works | Effectiveness | Cost/Drawbacks |
|---|---|---|---|
| Stop-loss | Cuts the trade at a preset level | High for defined risk | Can be hit by noise or gaps |
| Hedging | Offsets exposure with a related position | Moderate to high | Adds complexity and extra cost |
| Position size reduction | Trades smaller on volatile pairs | Very high | Lowers profit per trade |
| Avoid trading during news | Skips entries around major releases | High around event risk | Fewer trades, missed moves |
| Use of options to cap downside | Buys the right to limit loss | Very high | Premium reduces edge |
If you risk R200 on a trade, use a 50-pip stop, and each pip is worth R4, the size is R200 / (50 × R4) = 1 mini lot.
If the pair’s spread jumps from 0.8 pip to 2.5 pips, that extra cost belongs inside the stop distance, not in wishful thinking.
> Real execution risk is rarely just the chart. Spread, slippage, rollover, and news spikes all change the trade you actually get.
Before opening a trade, a quick check helps:
- Measure ATR and stop distance.
- Check whether the pair shares currency exposure with another open trade.
- Review the calendar for high-impact news and rollover time.
- Add spread and expected slippage to the risk model.
That checklist is boring in the best way.
It keeps a good setup from becoming an expensive lesson, especially when the pair looks calm but isn’t.
Practical Pair Selection Process and Checklist
What if the pair itself is the edge killer?
That happens more often than traders admit.
The BIS’s April 2022 survey showed global FX turnover at 7.5 trillion USD a day, and the US dollar was on one side of 88% of trades.
That huge pool of activity is why the first screen should always be execution quality, not just chart shape.
A clean pair choice usually starts with cost, then volatility, then event risk.
A broker comparison page like compare forex brokers helps when you want to check whether the spread, swap, and account type match the pair you plan to trade.
Fast resources to check before you commit
| Resource | Use case | Free/paid | Quick tip |
|---|---|---|---|
| Exness spread pages | Check live or typical spreads on majors and minors | Free | Look at the session you trade, not just a screenshot |
| XM spread pages | Compare spread and swap details by account type | Free | News-time spreads matter more than calm-hour numbers |
| HFM spread pages | Review liquidity-sensitive pricing across pairs | Free | Test the exact account type you would actually use |
| ForexFactory economic calendar | Track high-impact releases and central-bank dates | Free | Skip pairs with major news inside your holding window |
| ATR tools | Measure average daily movement and stop room | Free / freemium | If ATR is tiny versus costs, move on |
| Correlation matrix tools | Spot hidden overlap across candidate pairs | Free / paid | Two “different” pairs can still be one USD bet |
| Reuters news feed | Read macro and event context quickly | Paid | Use it to explain volatility spikes, not chase them |
| Bloomberg news | Cross-asset and rate-driven context | Paid | Strong for pairs tied to central-bank shifts |
| BIS Triennial FX Survey | Sanity-check global currency turnover patterns | Free | It explains why majors usually trade cleaner |
| CME Group FX futures specs | Compare standardized FX exposure and market structure | Free | Useful as a liquidity reference for active contracts |
ATR.
If the spread eats a meaningful chunk of your target, the pair is probably wrong for that setup.
- Screen costs first. For scalping, avoid pairs where spread and slippage can consume more than about
10%of the planned target.
- Match volatility to hold time. A swing trade needs enough daily movement to reach the stop and target without random chop killing the trade.
- Check event exposure. If your holding period crosses a rate decision, CPI release, or payroll print, the pair needs a stronger reason to stay on the list.
- Map correlation. If two pairs share the same currency and the same driver, they are not real diversification.
- Paper test before size. One clean month of tracked fills tells you more than a pretty backtest on stale assumptions.
A swing trader often does well with a short list rather than a long watchlist.
EUR/USD and USD/JPY are common starting points because they usually give cleaner execution and enough movement for multi-day holds, while a noisier cross can wait until the setup is stronger.
Pair selection gets easier once the process is boring.
The boring choice is often the one that survives costs, news, and real fills.
Choosing a Broker and Tools for Your Pair Choices
A pair can look perfect on a chart and still trade badly through the wrong broker.
A tight spread means little if fills slip, swaps bite, or the platform chokes at the worst moment.
That is why broker selection matters as much as pair selection itself.
For majors like EUR/USD and USD/JPY, traders usually want deep liquidity, fast execution, and a clean cost structure.
Broker features that actually change the outcome
Execution quality comes first.
Market execution with low rejection rates usually fits pair trading better than a broker setup that looks cheap on paper but fills poorly in fast markets.
Spreads and commissions are the next filter.
A raw spread account can work well for active traders, while a wider all-in spread may suit lower-frequency setups.
Instrument coverage matters too.
If your pair idea depends on crosses, metals, or index correlation, a broker with a wider book gives you more room to test related signals.
Broker comparison for pair traders
| Broker | Example spread on EUR/USD | Execution model | Instrument coverage (pairs) | Notable feature |
|---|---|---|---|---|
| Exness | From 0.0 pips on raw-style accounts | Market execution | 100+ FX pairs | Very strong account variety and flexible pricing |
| XM | From about 1.0 pips on standard-style accounts | Market execution | 55+ FX pairs | Broad education and account choice |
| HFM | From 0.0 pips on Zero-style accounts | Market execution | 50+ FX pairs | Multiple account types for different cost profiles |
| FBS | From 0.7 pips on standard-style accounts | Market execution | 70+ FX pairs | Good range of beginner-friendly account formats |
| Generic market maker example | 1.2–2.5 pips | Instant or dealing-desk style | 30–50 FX pairs | Simple access, but wider friction and more requotes |
For pair trading, the real question is not “Which broker is cheapest?” but “Which broker gives the most repeatable fill quality on the pairs I trade?”
Tools that make pair testing less guessy
A demo account is still the best first filter.
Run the pair through calm hours and news spikes, then compare the difference between the backtest and the live fill behavior.
Free tools are fine for charting and basic screening.
Paid platforms earn their keep when you need deeper data, faster execution, or better testing around slippage and spread shifts.
- Charting platform: Good for structure, sessions, and volatility checks.
- Economic calendar: Useful for timing around central bank events and data releases.
- Spread tracker: Helps spot when a pair gets expensive to trade.
- Demo account: Best for checking whether a pair behaves the way the backtest promised.
If the broker passes the fill test, the rest gets much easier.
If it fails, even a beautiful setup can turn into a slow leak.
Advanced Considerations: Correlations, Macro Drivers and Exotic Pair Nuances
What if two trades look different on the screen but behave like the same bet? That happens constantly in FX, especially when both pairs carry the same dominant currency.
EUR/USD and GBP/USD may look like separate ideas.
In practice, they can both rise and fall on the same USD move, the same risk mood, or the same rates shock.
> In the BIS April 2022 Triennial Central Bank Survey, global FX turnover averaged $7.5 trillion per day, and the U.S. dollar appeared on one side of 88% of trades.
That scale matters.
Majors usually absorb order flow better, while smaller pairs can get messy fast when local liquidity thins.
Reading correlation without fooling yourself
A correlation matrix is useful only if you treat it like a map, not a verdict.
Pairs that share a currency often share a hidden driver, so two “different” trades may still cluster in drawdown.
Commodity-linked pairs, such as AUD/USD and USD/CAD, often react to the same broad commodity and growth themes.
Rate-linked pairs, such as USD/JPY and EUR/USD, often reflect central bank stance, yield gaps, and shifting expectations for policy.
That is where factor thinking helps.
If one basket is really a USD bet, or a risk-on bet, then the number of pairs in the basket matters less than the number of independent drivers.
Exotic pairs need a different checklist
Exotics are not just majors with a bigger candle.
They often bring wider spreads, patchier fills, and price jumps that look random until a local macro event hits.
They can still be useful.
A trader with a clear thesis on local rates, commodity pressure, or policy shock may find an exotic pair fits the story better than a major.
### Trading exotics: practical checklist and pitfalls
| Attribute | Majors | Exotics | Practical advice |
|---|---|---|---|
| Liquidity | Deep and consistent, especially in active sessions | Thinner and more fragile, with dry spells | Use majors for fast execution and clean exits |
| Spreads | Usually tighter, especially on EUR/USD and USD/JPY | Usually wider and less stable | Budget the spread before the trade, not after it |
| Volatility | Often smoother, with clearer reaction to global news | More jumpy and discontinuous | Use smaller size and wider room only when the setup justifies it |
| Slippage risk | Usually lower during liquid hours | Higher around local news, rollovers, and quiet sessions | Prefer limit orders when the pair is known to gap |
| Availability with brokers | Widely offered | Often limited by broker list, session hours, and venue access | Confirm the symbol exists before building the plan |
Exotics can work, but they demand more respect for timing, cost, and local headlines.
The safest habit is simple: check the shared currency, the macro driver, and the real execution cost before sizing up.
That habit keeps correlation from ambushing the portfolio later.
The Pair Decides the Trade
If a setup looks beautiful on EUR/USD and messy on GBP/JPY, that usually is not random.
The pair itself is changing the game through volatility, spread, and the news that moves it.
The most useful habit from this article is simple: judge the market first, then judge the setup.
That matters because strategy, position size, and pair choice never live in separate boxes.
A trader who sizes the same way on a calm major and a jumpy exotic is inviting avoidable damage, especially when spreads widen or news hits fast.
Brokers and tools matter for the same reason; they shape what your rules can actually survive in live conditions.
Pick the pair before the setup. Today, choose one currency pair you already trade and test it against your current rules, your risk size, and the cost of getting in and out.
If the fit feels weak, forex brokers in south africa and use that research to make your next trade cleaner, not just more exciting.